Lift Kit Installation
How To Install Suspension Lift Kits
Leveling kits offer a more affordable and easier installation compared to suspension lift kits. Depending on the kit you purchase, you'll only need to replace a few parts, and it won't affect your vehicle's factory payload capacity. While the process is relatively simple, it's important to read and understand the instructions thoroughly before starting and ensure you have all the necessary tools.
One advantage of leveling kits is that you typically don't need to replace multiple parts. However, you will need to disassemble certain components of your current or factory suspension to install the leveling kit. Here are some essential tools you should have:
- Floor jack and jack stands are rated for the appropriate weight to support your vehicle's make and model.
- Torque wrench.
- Wrenches in various sizes.
- Screwdriver.
- Pliers.
- Hammer.
- Extra nuts, bolts, and screws in case of misplacement.
- Ratchet.
- PB Blaster.
While most leveling kits are similar, our instructions are a general guide. It's always recommended to consult a trained and licensed suspension expert if you have any questions and to avoid deviating from the instructions provided with your kit. In general, we recommend following these steps for all installations:
- Open your kit and ensure that all necessary parts are included.
- Read the instructions thoroughly before beginning the installation.
- Always block off your tires and ensure that your vehicle is parked with the emergency brake engaged.
- Obtain torque specifications from the installation instructions or shop manuals for your specific vehicle.
- Prioritize safety – if you feel unsure or uncomfortable about a particular task, it's best to avoid it.
Installing Coil Spring Spacers:
- Block off your front tires and ensure that your vehicle is securely parked with the emergency brake engaged. Use a hydraulic jack (avoid using jacks from spare tire kits) and jack stands to lift both front wheels off the ground. Refer to the manual for the correct jacking points to safely lift the vehicle. Support the vehicle with jack stands on the frame, rather than relying solely on the jack.
- Rbothvfront tires.
- Once the tires are removed, use a floor jack to raise the suspension on the axle, compressing the spring slightly for easy removal.
- Securely attach a spring compressor to the spring.
- Remove the spring retaining clip.
- Remove the shocks.
- Disconnect the sway bar link.
- If the bump stop is located inside the coil spring, remove it. It should come out easily, and we suggest using pliers or a pry bar, but if not, feel free to add PB Blaster.
- Lower the axle housing using the jack, allowing the coil to come out easily with the assistance of the spring compressor.
- Optional: While the coil and other components are removed, it is recommended to grease the areas where the parts were attached for smoother reinstallation. You may also want to clean the wheel.
- Ensure that all fasteners are tightened according to the manufacturer's specifications.
- Place the coil spring spacer in the spring seat over the bump stop.
- With the spring compressor still attached, return the spring to its original position and secure it with the spring retaining clip.
- Raise the wheel to its initial height when you first compressed the spring. Once secure, remove the spring compressors.
- Reinstall the bump stop, sway bar link, and shocks.
- Make sure that everything is securely attached, following your vehicle's specifications.
- Repeat the process on the other side.
- Once the spring spacers are fully installed, replace the tires and lower your vehicle. Remove all blocks.
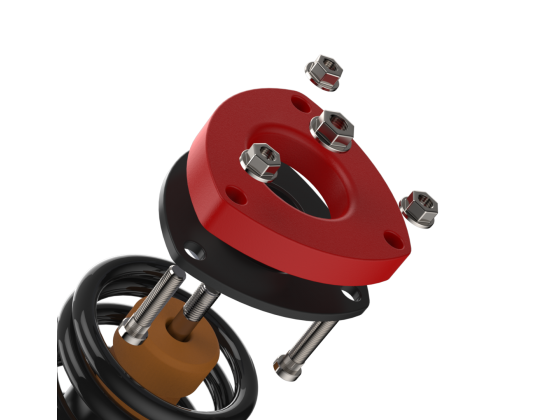
Installing Strut Extensions:
- Block off your rear tires and ensure that your vehicle is securely parked with the emergency brake engaged. Use a hydraulic jack (avoid using jacks from spare tire kits) and jack stands to lift both wheels off the ground. Refer to the manual for the correct jacking points to safely lift the vehicle. Support the vehicle with jack stands on the frame, rather than relying solely on the jack.
- Remove both tires.
- Follow the instructions provided with your kit to assemble the strut extenders. This typically involves inserting the provided studs into the strut extenders.
- Disassemble the sway bar link.
- Remove the fastener for the tie rod end.
- Loosen the ball joint. If necessary, separate the knuckle from the upper ball joint. While keeping the ball joint loose, dislodge the tie rod end from its position. You may need to use a mallet to remove it from the knuckle. Strike the knuckle where the tie rod end and ball joints pass through, taking care not to damage the tie rods or ball joint stud.
- Remove the lower strut bolt. If the strut has alignment slots, mark both surfaces with a paint marker or scribe to aid in realignment later.
- Use a jack to support the lower control arm and a pry bar on the upper control arm to fully remove the ball joint, pushing the knuckle aside to access the strut.
- Unfasten the top three fasteners securing the strut. Carefully lower the jack supporting the lower control arm to create enough space for removing the complete strut assembly.
- Ensure that all fasteners are tightened according to the manufacturer's specifications.
- Attach the new strut extension on top of the factory strut.
- Reinstall the strut, ensuring proper alignment of the bolts. You may need a crowbar to assist in aligning it onto the arm but do not fasten it yet.
- Reinstall the lower strut bolt into the strut on the arm, aligning the marks made in step 7. Reinstall the upper ball joint.
- Insert the tie rod end back into the taper and fasten it securely.
- Tighten the ball joint, tie the rod end, and strut the bolt.
- Securely tighten the top three fasteners to hold the strut in place.
- Reinstall the sway bar link.
- Replace both tires, ensuring they are tightened to the specified torque.
- Lower your vehicle back down and remove all blocks.
If you encounter any uncertainties or have questions, it is always advisable to seek assistance from a professional. They can provide valuable guidance and ensure that the leveling kit is installed correctly and safely.
All comments
Good day. If i fit 40mm lift spacers.to my bmw e92.How mush more,ground clearance will i gain.Thank you